はじめに
初心者向けに、AnsibleAWXの構築方法、操作方法をまとめました。
また、AnsibleAWXを使用するにあたり、GitLabを使用します。
playbookを管理すると使い勝手もよいので参考にしてみてください。
環境
・OS : CentOS8
・Ansible 2.9.10
・Ansible AWX 17.0.1
・GitLab13.8.4
目次
1. Ansible AWXの構築方法
Ansible AWXの構築を行う手順を記載します。
1.1 Ansible AWXインストール準備
AnsibleAWXをインストールするための準備をいくつか行います。
まずfirewalldを設定します。
[root@localhost ~]# firewall-cmd --add-service=http --zone=public --permanent
[root@localhost ~]# firewall-cmd --add-masquerade --zone=public --permanent
[root@localhost ~]# firewall-cmd --reload
[root@localhost ~]# firewall-cmd --list-all
public (active)
  target: default
  icmp-block-inversion: no
  interfaces: ens192
  sources:
  services: cockpit dhcpv6-client http ssh
  ports:
  protocols:
  masquerade: yes
  forward-ports:
  source-ports:
  icmp-blocks:
  rich rules:
次にpython3をインストールし、仮想環境を作成します。
[root@localhost ~]# dnf install python3 -y
[root@localhost ~]# python3 -m venv venv
[root@localhost ~]# source ~/venv/bin/activate
※ちなみに仮想環境から抜け出したい場合は、以下コマンドを実行してください。仮想環境に入る場合は上記『source』コマンドの箇所を実行してください。
(venv) [root@localhost ~]# deactive
[root@localhost ~]#
次にpipコマンドを使用し、必要なライブラリをインストールします。
(venv) [root@localhost ~]# pip install docker-compose selinux 次にansibleをインストールします。
### 最新バージョンでインストールする場合 ###
(venv) [root@localhost ~]# pip install ansible

### ansibleのバージョンを指定してインストールする場合 ###
(venv) [root@localhost ~]# pip install ansible==2.9.10
インストールしたライブラリは以下コマンドで確認できます。
(venv) [root@localhost ~]# pip freeze
ansible==2.9.10
attrs==19.3.0
・
・
次にDockerをインストールします。
(venv) [root@localhost ~]# dnf config-manager --add-repo=https://download.docker.com/linux/centos/docker-ce.repo
(venv) [root@localhost ~]# dnf install --nobest docker-ce -y
インストール後に起動設定を行います。
(venv) [root@localhost ~]# systemctl start docker
(venv) [root@localhost ~]# systemctl enable docker
1.2 Ansible AWXインストール
AnsibleAWXをGithubからクローンします。
(venv) [root@localhost ~]# dnf install git -y
(venv) [root@localhost ~]# git clone https://github.com/ansible/awx

### バージョンを指定する場合 ###
(venv) [root@localhost ~]# git clone https://github.com/ansible/awx -b 17.0.1
ディレクトリを移動しインストールのためのファイルを修正します。
adminユーザのパスワードを設定してください。
(venv) [root@localhost ~]# cd awx/installer/
(venv) [root@localhost installer]# vi inventory
以下箇所を修正します。(コメントアウトを外してます)
admin_user=admin
# admin_password=password
↓
admin_user=admin
# admin_password=password
admin_password=password

#project_data_dir=/var/lib/awx/projects
↓
project_data_dir=/var/lib/awx/projects
修正が完了したらインストールを行います。
playbookが実行されます。failedがゼロであることを確認してください。
(venv) [root@localhost installer]# ansible-playbook -i inventory install.ymldockerのコンテナは以下コマンドで確認できます。
(venv) [root@localhost installer]# docker psブラウザから『http://”AnsibleAWXサーバのIP”』にアクセスします。
AWXのUpdateの画面が表示されたら終了するまで待ってください。
2. GitLabの構築
GitLabの構築手順を記載します。
AnsibleAWX内でProjectを作成する際にGitLabを使用しますので、構築手順を記載します。
2.1 GitLabインストール
以下URLはGitLab公式のインストール手順です。こちらの手順を行います。
本手順では、https化は行いません。
[root@localhost ~]# systemctl status sshd
● sshd.service - OpenSSH server daemon
   Loaded: loaded (/usr/lib/systemd/system/sshd.service; enabled; vendor preset: enabled)
   Active: active (running)

[root@localhost ~]# firewall-cmd --permanent --add-service=http
[root@localhost ~]# firewall-cmd --reload
[root@localhost ~]# firewall-cmd --list-all
public (active)
  target: default
  icmp-block-inversion: no
  interfaces: ens192
  sources:
  services: cockpit dhcpv6-client http ssh
  ports:
  protocols:
  masquerade: no
  forward-ports:
  source-ports:
  icmp-blocks:
  rich rules:

[root@localhost ~]# curl -sS https://packages.gitlab.com/install/repositories/gitlab/gitlab-ce/script.rpm.sh | bash
[root@localhost ~]# EXTERNAL_URL="http://GitLabサーバのIP" dnf install -y gitlab-ce
完了しました!
インストールが完了後、画面操作を行い設定します。
2.2 ログイン
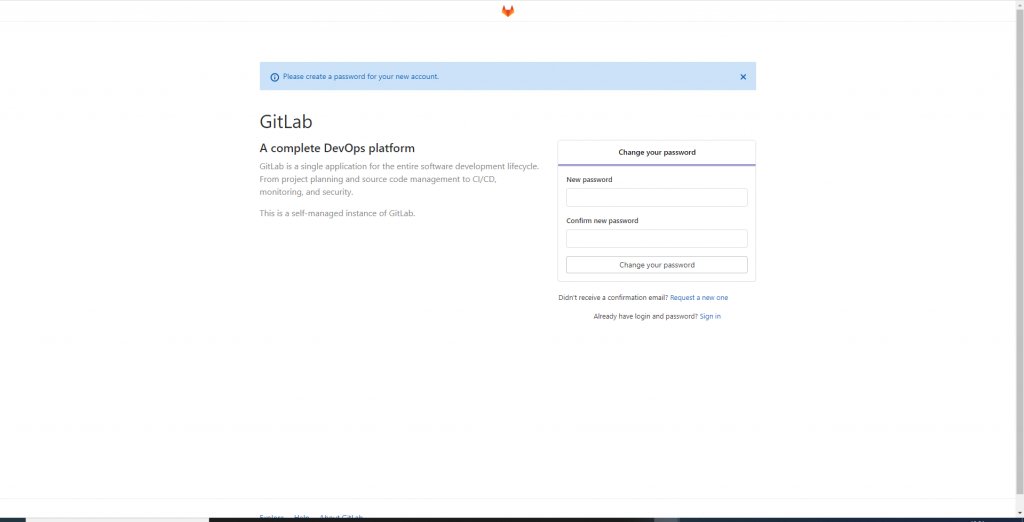
ブラウザから『http://”GitLabサーバのIP”』にアクセスします。
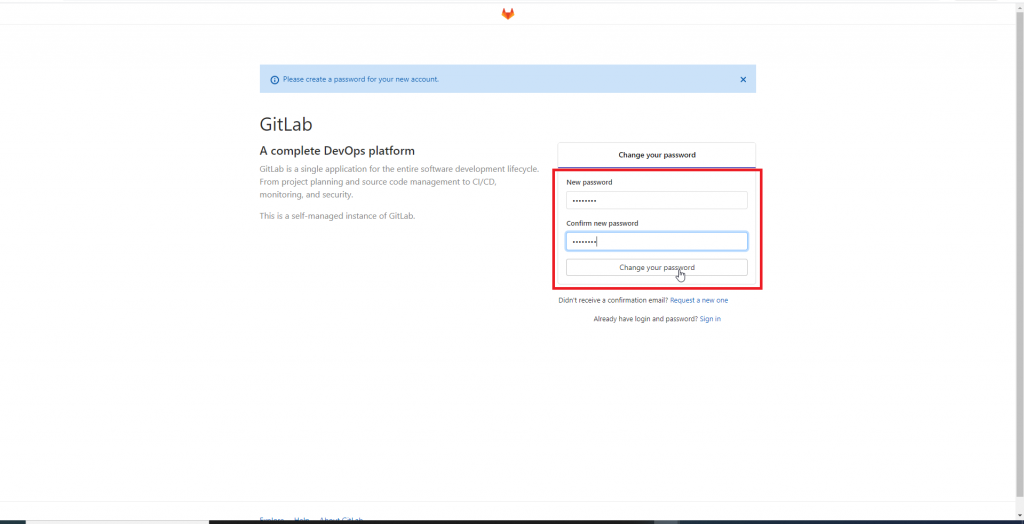
GitLabの画面には、パスワード作成画面が表示されます。
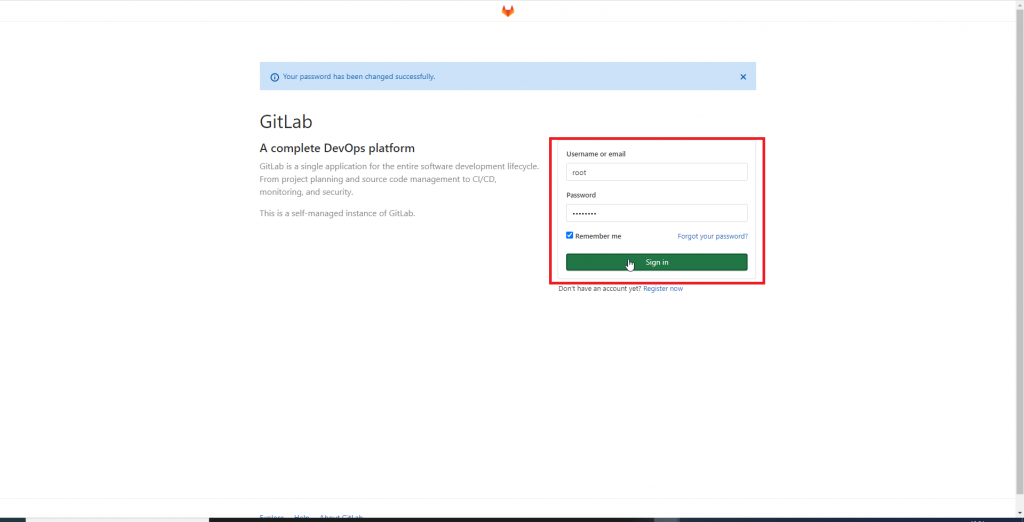
パスワードを作成し、デフォルトユーザ『root』でログインできることを確認します。
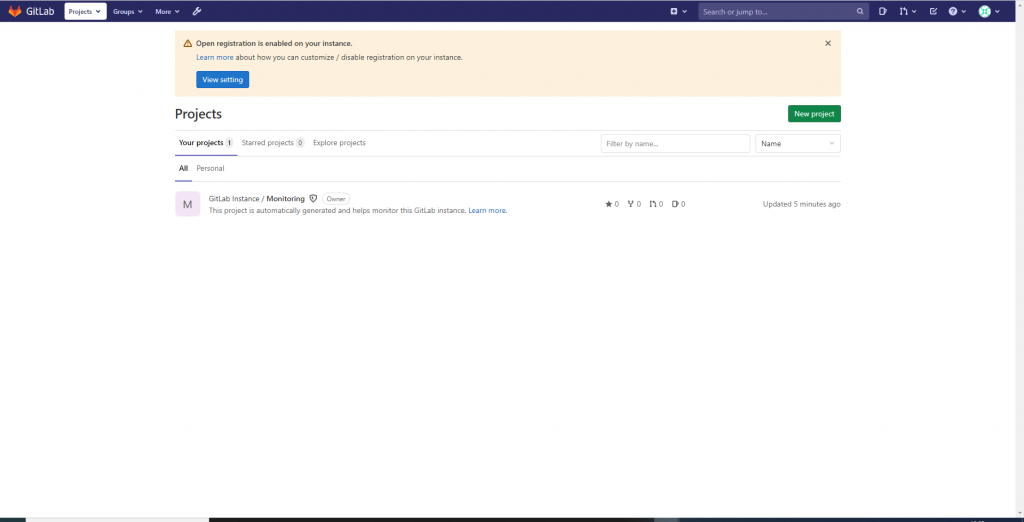
2.3 グループ・プロジェクトの作成
次にグループとプロジェクトの作成を行います。
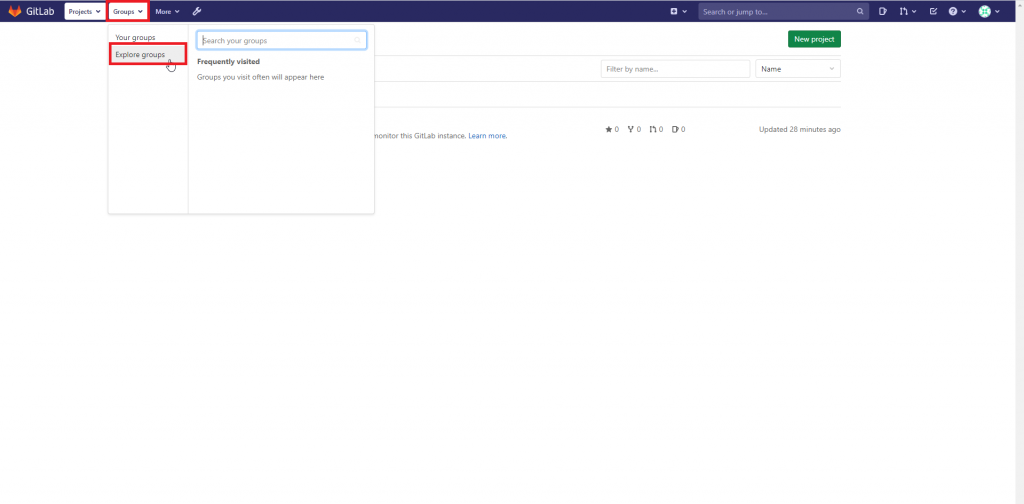
『Explore groups』をクリックします。
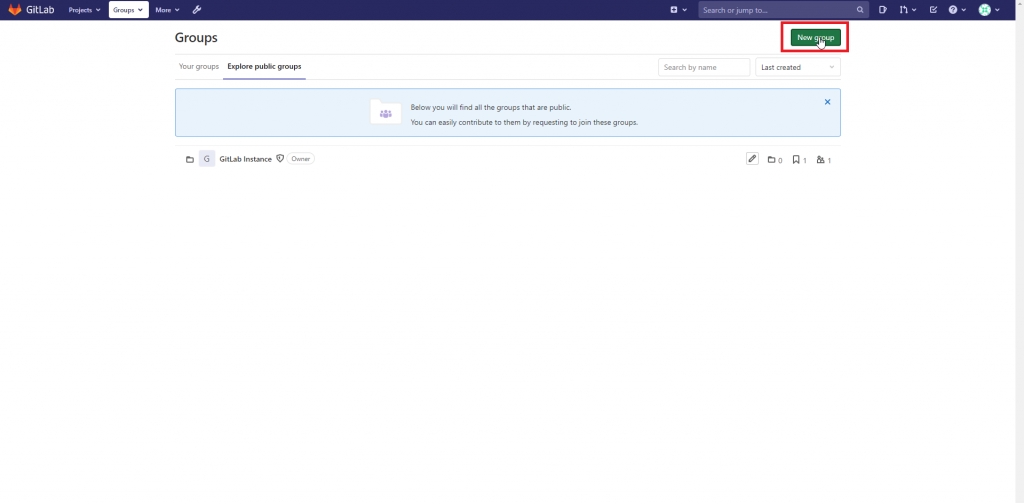
『New group』をクリックします。
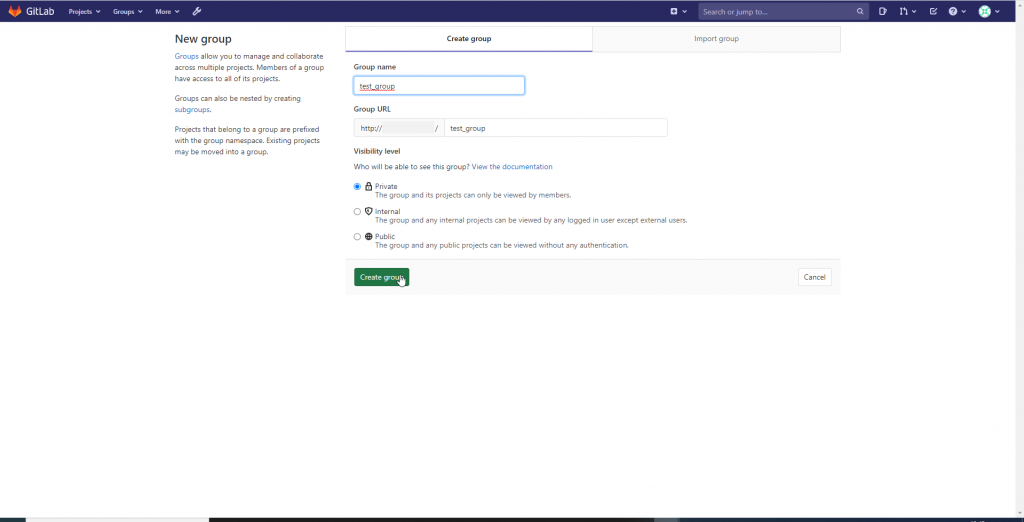
『Group name』は『test_group』にします。
『level』は『Private』にします。
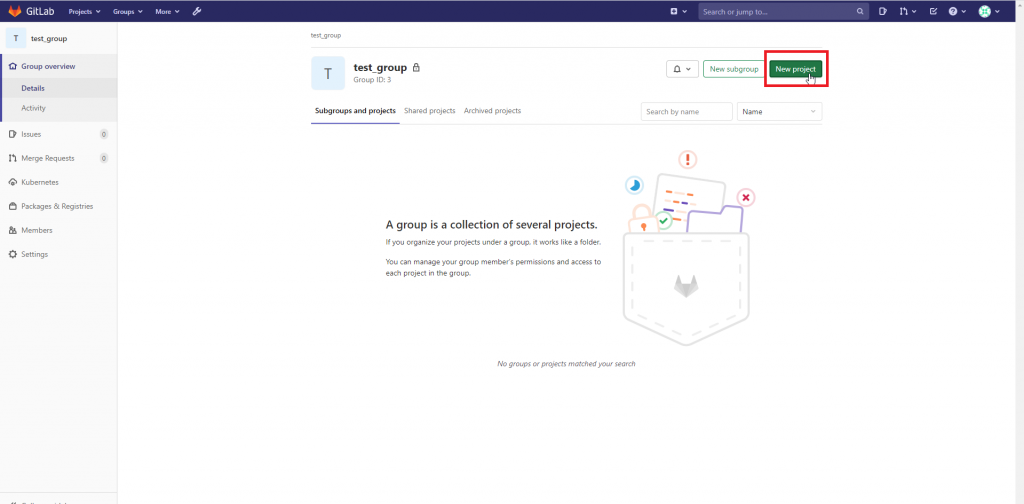
グループ作成後『New project』をクリックします。
『Create blank project』をクリックします。
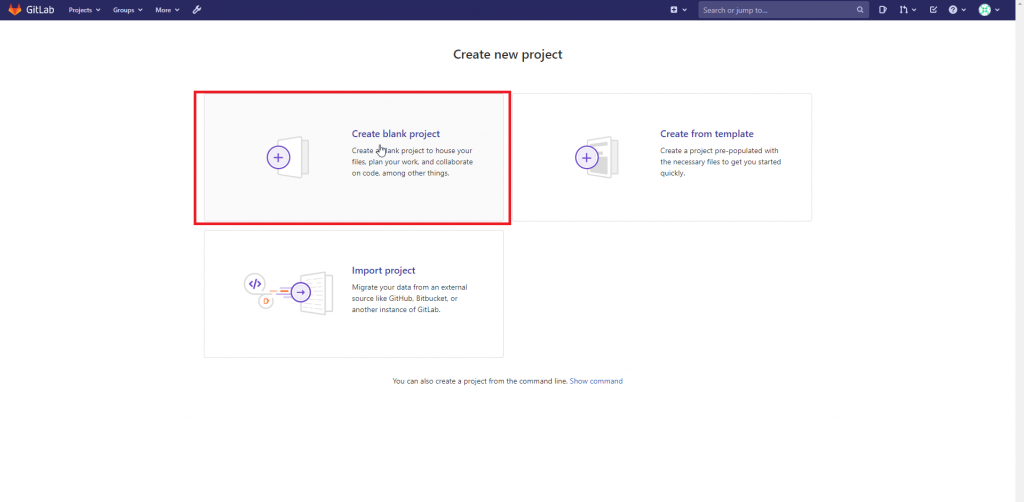
『Project name』は『test_project』にします。
『level』は『Private』にします。
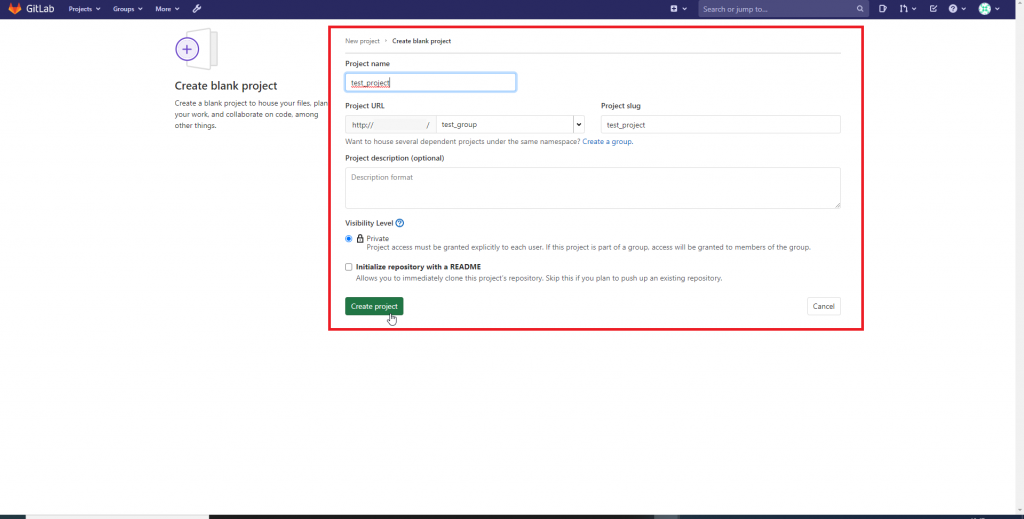
作成後、プロジェクトが表示されます。
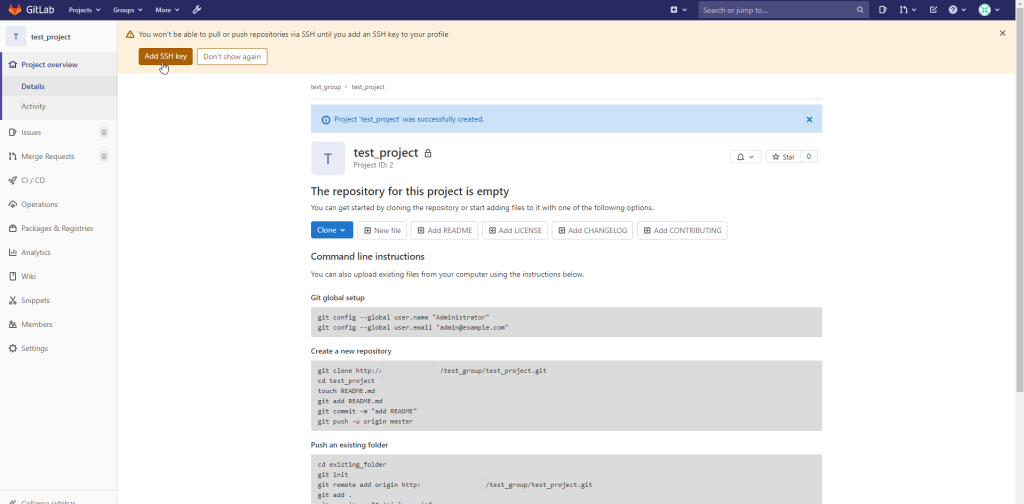
sshkeyの設定はどちらでもよいです。
本手順では設定することとします。
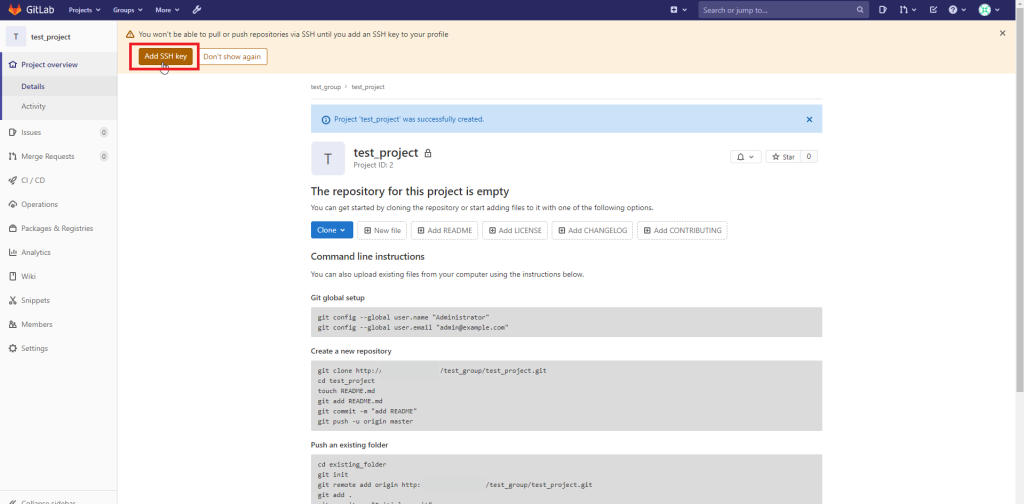
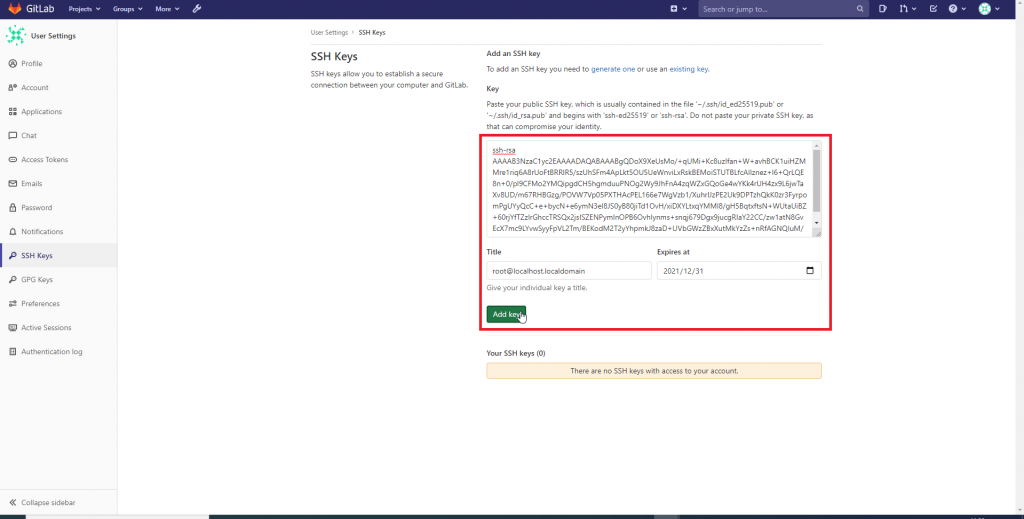
画面設定は以上です。
次に作成したプロジェクトにplaybookを格納します。
2.4 playbookの格納
プロジェクトをクローンします。クローン先のサーバは任意です。
今回は『pingモジュール』を使用し、検証します。
anisbleコマンドを実行する際に使用するinventoryなどは、AnsibleAWX内で設定ができるため必要ありません。
AnsibleAWX内で設定できるものはなるべくAWXで設定するほうが良いです。
playbookは『site.yml』になります。
(venv) [root@localhost ~]# git clone http://"gitlabサーバのIP"/test_group/test_project.git
Cloning into 'test_project'...
Username for 'http://"gitlabサーバのIP"': root
Password for 'http://root@"gitlabサーバのIP"':
warning: You appear to have cloned an empty repository.
(venv) [root@localhost ~]# ls
anaconda-ks.cfg  awx  test_project
(venv) [root@localhost ~]# cd test_project/
(venv) [root@localhost test_project]# vi site.yml
(venv) [root@localhost test_project]# cat site.yml
---
- name: sample
  hosts: test_hosts
  gather_facts: no
  collections:
    - ansible.builtin
  tasks:
    - name: 疎通チェック
      ping:
playbookの内容を追加変更した場合、GitlabにpushしないとAnsibleAWXには反映されません。その手順は以下になります。
こちらは、修正が行われるたびに実行してください。
(venv) [root@localhost test_project]# git add site.yml
(venv) [root@localhost test_project]# git commit -m"playbookを追加"
(venv) [root@localhost test_project]# git push origin master
Username for 'http://"GitLabサーバのIP"': root
Password for 'http://root@"GitLabサーバのIP"':
 * [new branEnumerating objects: 3, done.
Counting objects: 100% (3/3), done.
Delta compression using up to 2 threads
Compressing objects: 100% (2/2), done.
Writing objects: 100% (3/3), 347 bytes | 347.00 KiB/s, done.
Total 3 (delta 0), reused 0 (delta 0), pack-reused 0
To http://"GitLabサーバのIP"/test_group/test_project.git
 * [new branch]      master -> master
次に、AnsibleAWXの画面を操作します。
3. Ansible AWXの操作
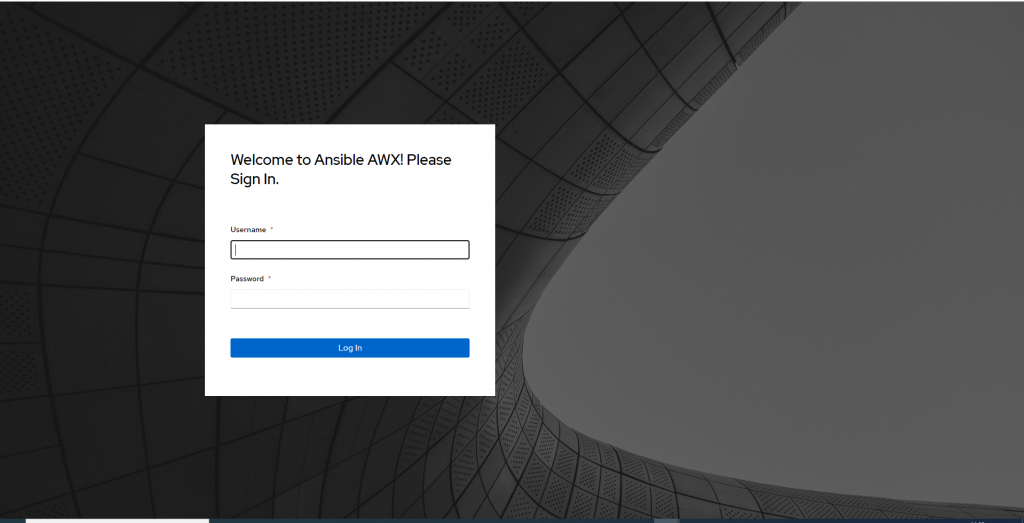
3.1 ログイン
AnsibleAWXにログインします。
ユーザ名『admin』、パスワード『”インストール時に設定したパスワード”』です。
※AnsibleAWX16.0.0以前のバージョンの場合はUIが異なります。
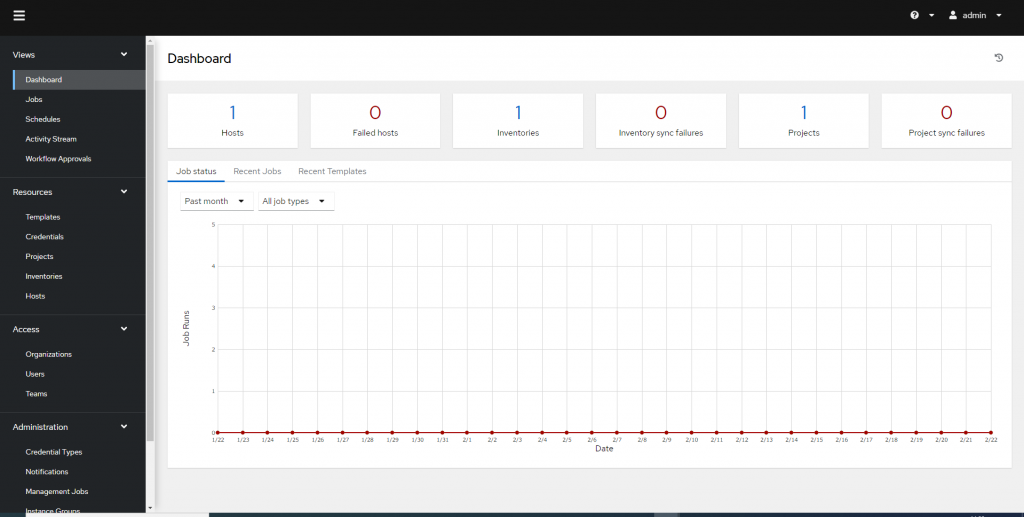
ログイン後のダッシュボードは以下のように表示されます。
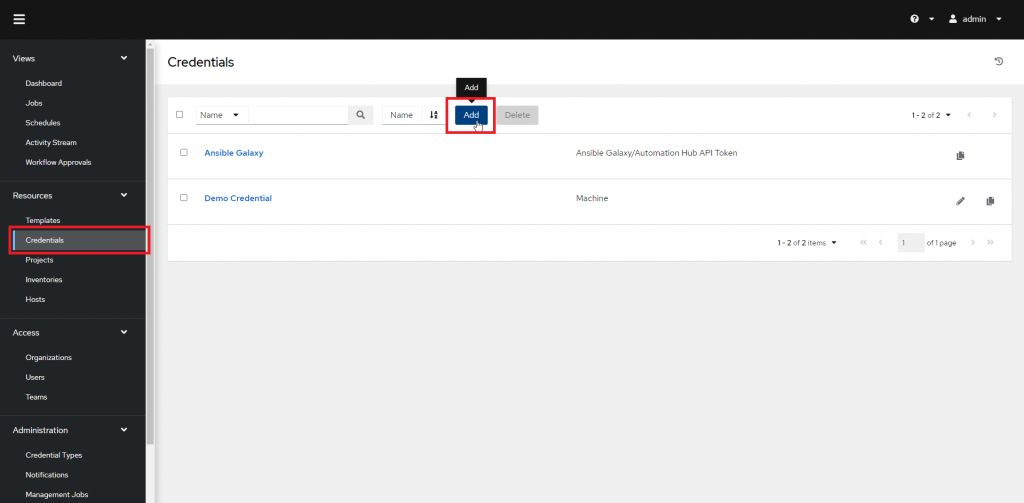
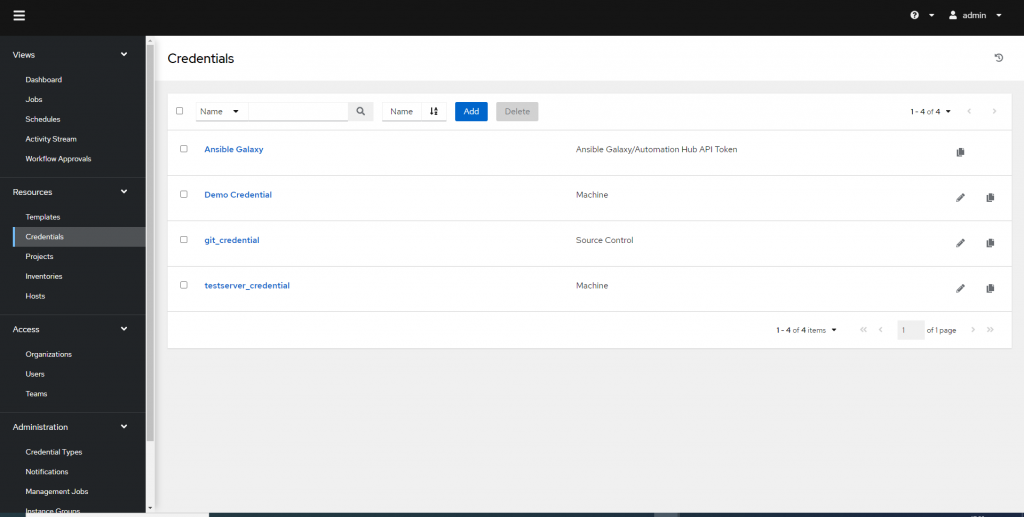
3.2 Credentials
ログイン後、『Credentials(認証情報)』の設定を行います。
『Add』をクリックします。
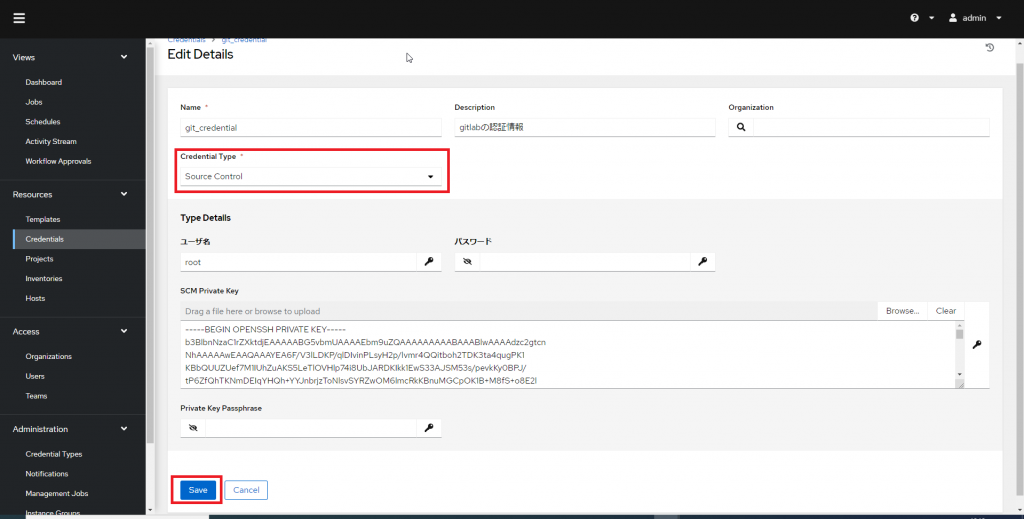
認証情報を入力します。
『Name』は『git_credential』にします。
『Credential Type』を『Source Control』にします。
『Credential Type』には、トークンを使用したりと複数の選択肢が存在しますので環境に合わせて使用してください。
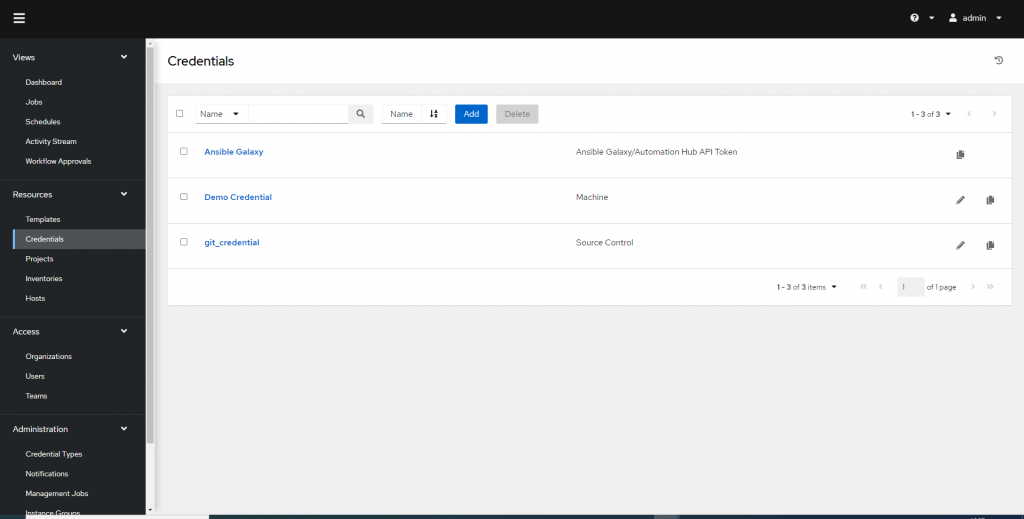
以下のように作成されました。
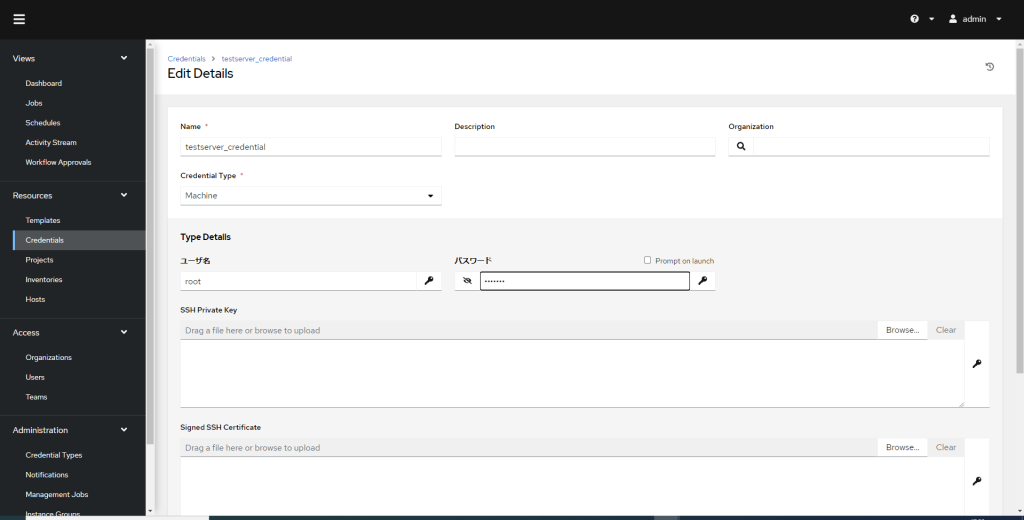
また、今回の実行するplaybookは対象サーバに疎通を確認するので、その為の認証情報も登録します。
『Name』は『testserver_credential』
『Credential Type』は『Machine』として作成します。
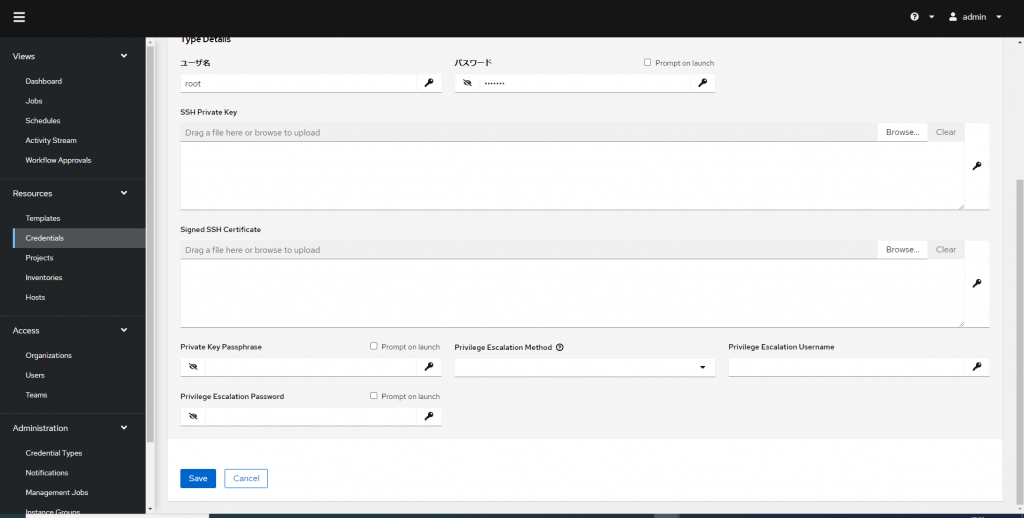
対象サーバの認証情報も作成されたことを確認します。
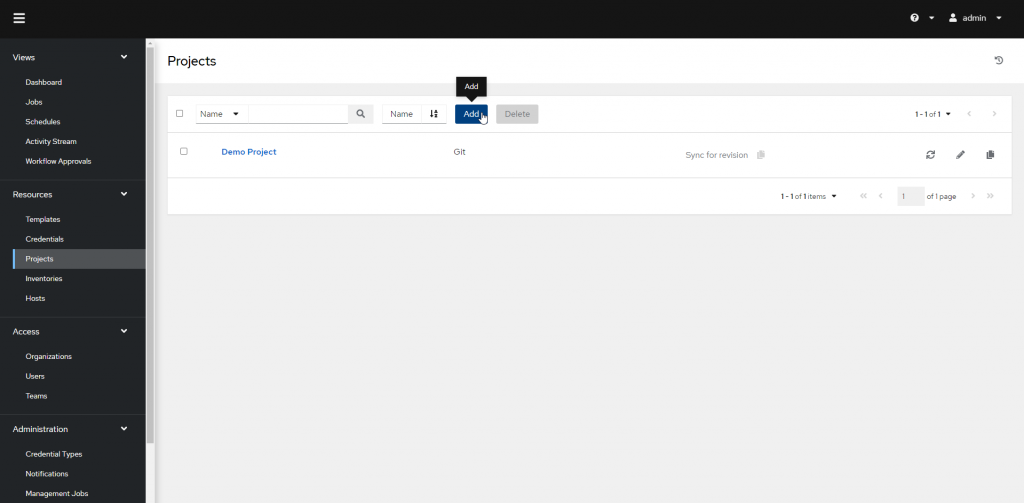
3.3 Projects
『Add』をクリックします。
『Name』は『test_project』にします。
『Source Control Credential Type』は『Git』を指定します。
『Source Control URL』には『git@”GitLabサーバのIP”:test_group/test_project.git』を記載します。
GitLabサーバからSSHクローンするため、GitLabのプロジェクト内で確認してください。
『Source Control Credential』は『git_credential』を選択します。
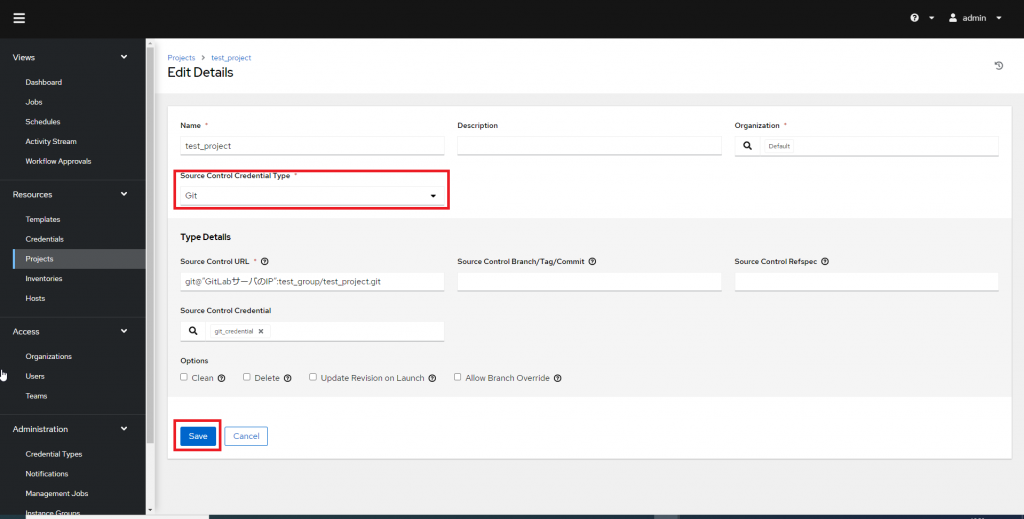
保存後『Projects』をクリックし戻ります。
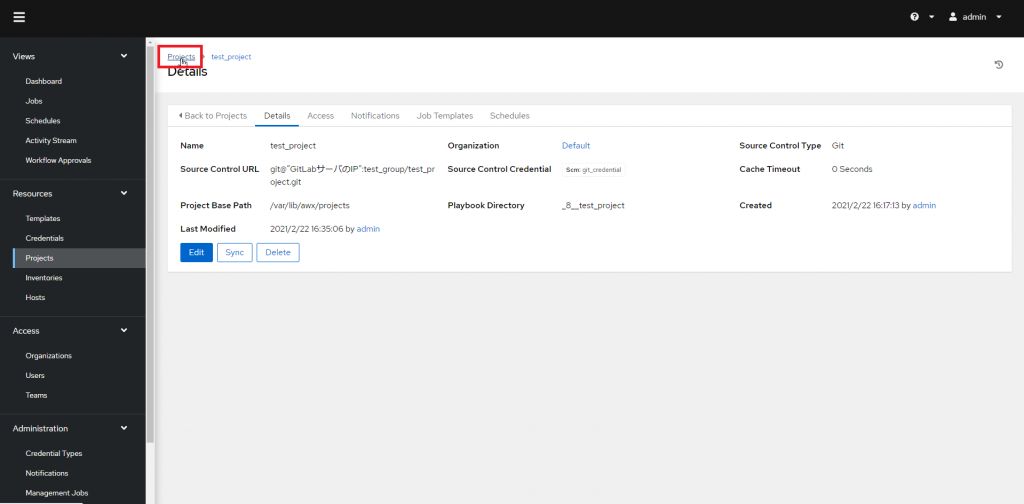
右側の『同期ボタン』をクリックします。□が点滅し緑マークになればGitLabとの同期が成功です。
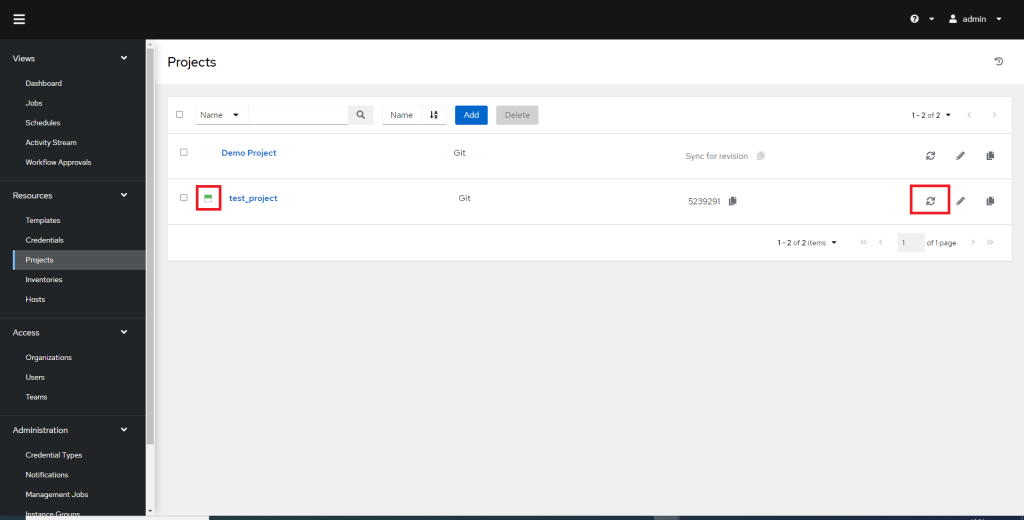
※Projectsはplaybookを修正するたびにGitLabと同期をしないと最新にならないので、playbookを修正後は都度、更新マークをクリックし最新の状態にしてください。
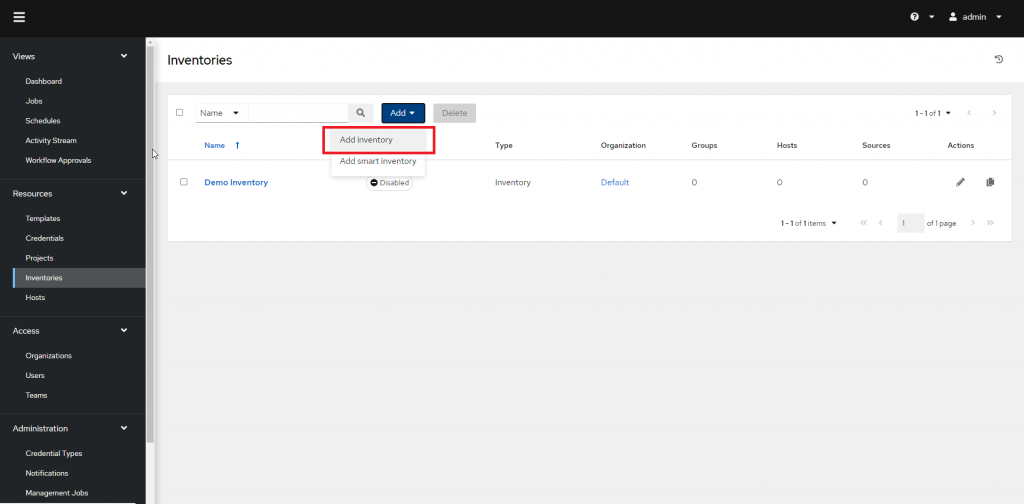
3.4 Inventories
『Add』をクリックし『Add inventory』をクリックします。
inventoryの作成はsmartではなく標準で作成します。
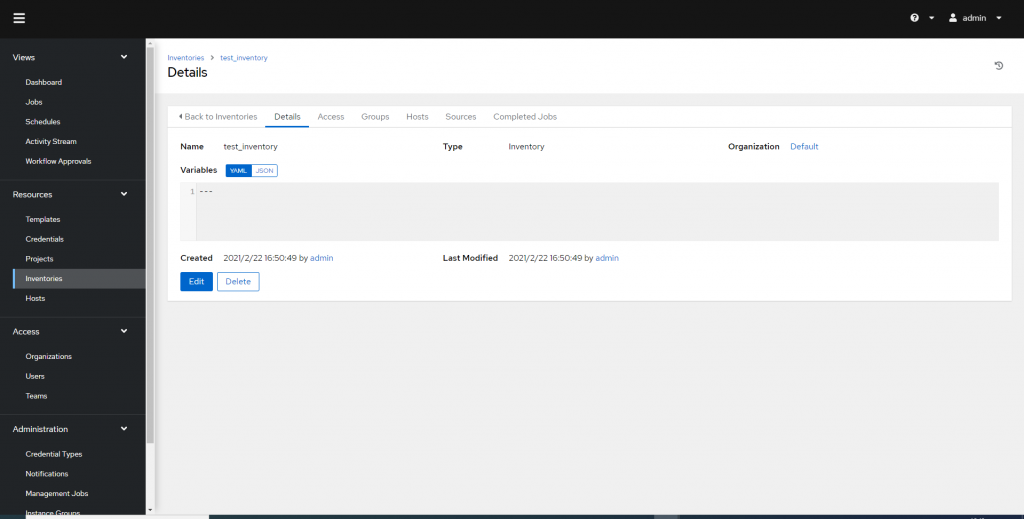
『Name』を『test_inventory』にします。
inventory内で変数を記載する場合は『Variables』に記載すればよいです。

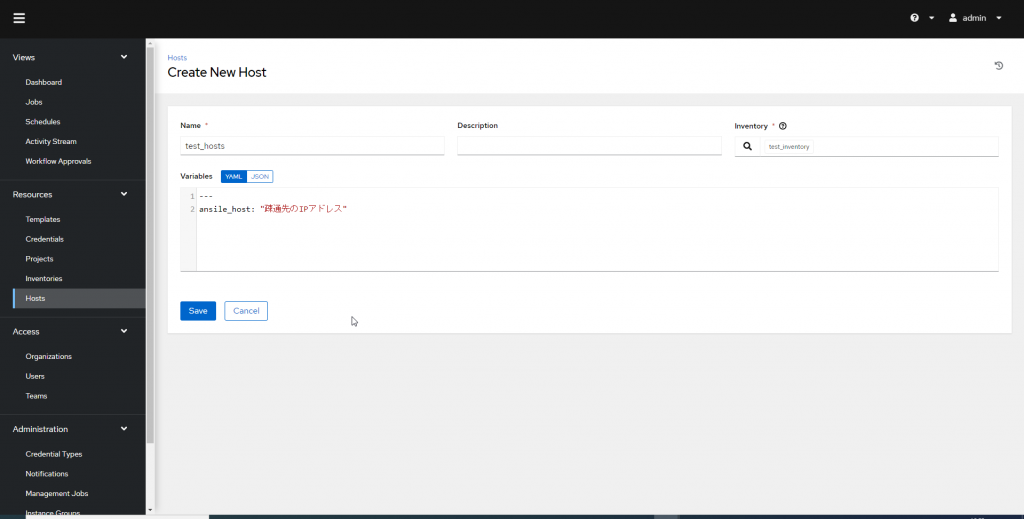
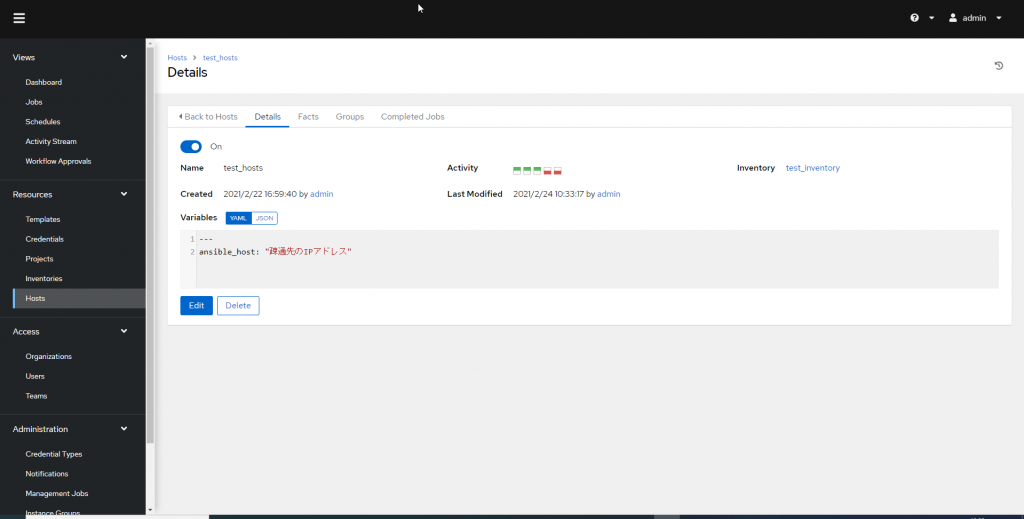
3.5 Hosts
『Add』をクリックします。
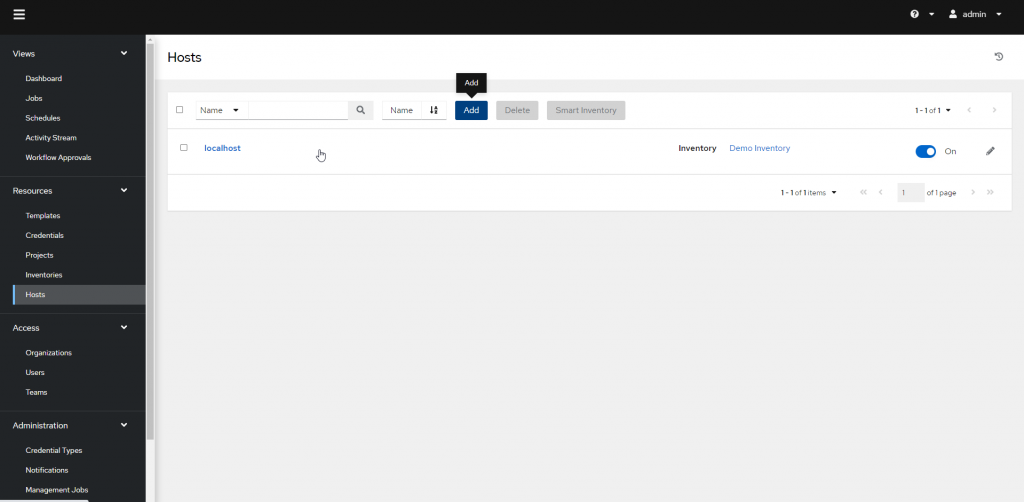
『Name』を『test_hosts』とします。(playbook内で指定しているhosts)
『inventory』は『test_inventory』指定し、
『Variables』にはpingモジュールを使用するための疎通先のサーバIPを記載します。
本検証では設定しませんが、『Groups』を設定する場合はタブの『Groups』をクリックし追加してください。『Groups』を使用すると実行先の制御など管理しやすくなります。
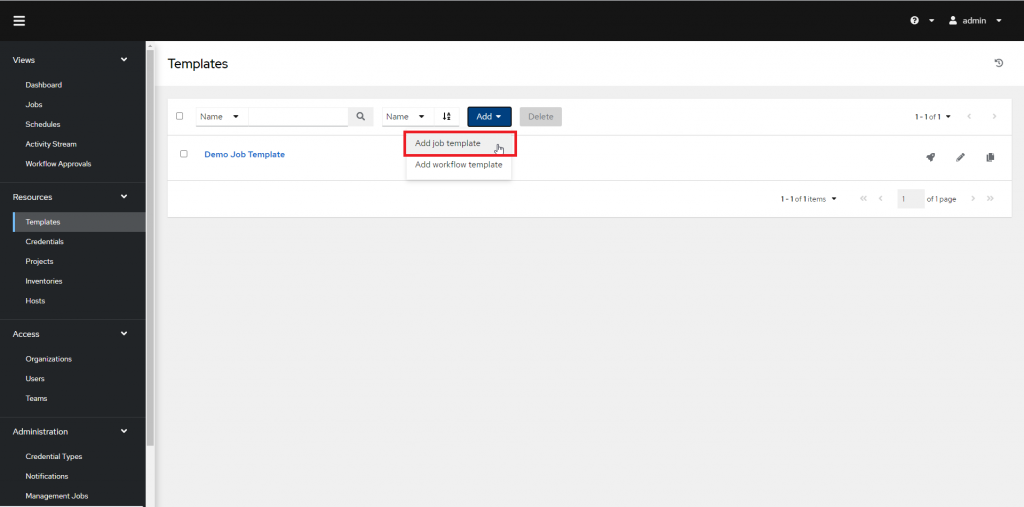
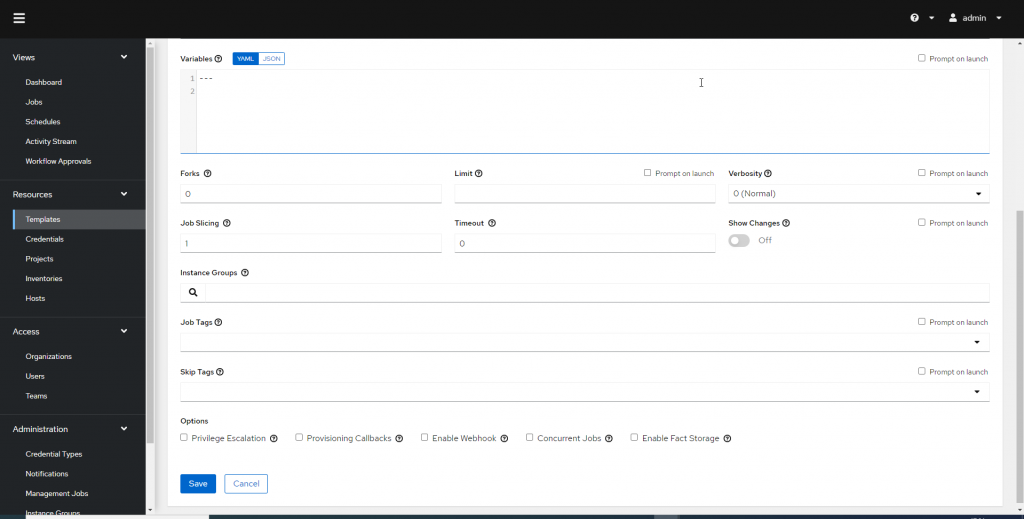
3.6 Templates
『Add』をクリックし、『Add job template』をクリックします。
本検証では通常のテンプレートで作成します。『Add workflow template』を選択するとplaybookの実行制御などワークフローを作成できます。
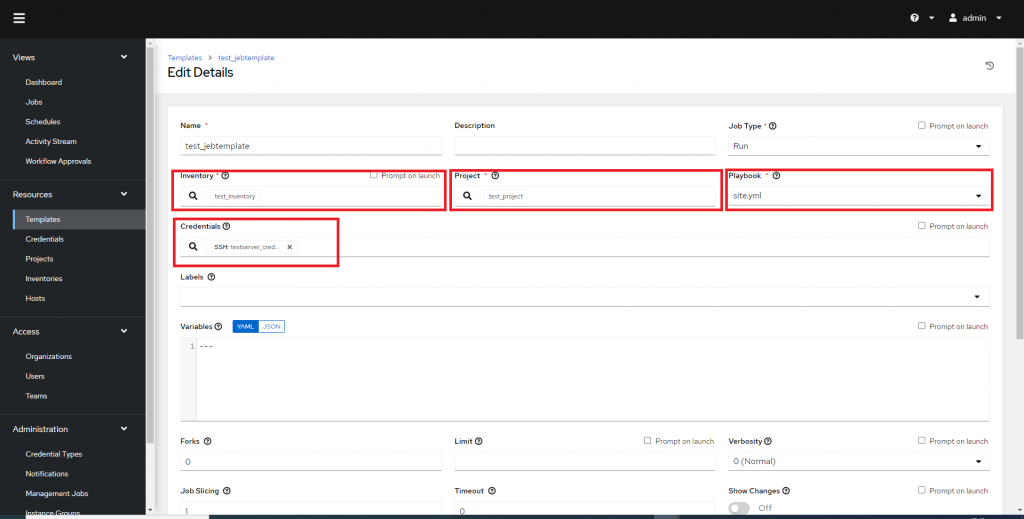
『Name』は『test_template』にします。
『Inventory』『Project』は先ほど作成したものを選択します。
『Credentials』は『testserver_credential』を選択します。
また、『job Type』は『Run』になっていますが、『Check』にすればテスト実行が可能になります。
作成後『Launch』をクリックすると画面が変わり、playbookが実行されます。
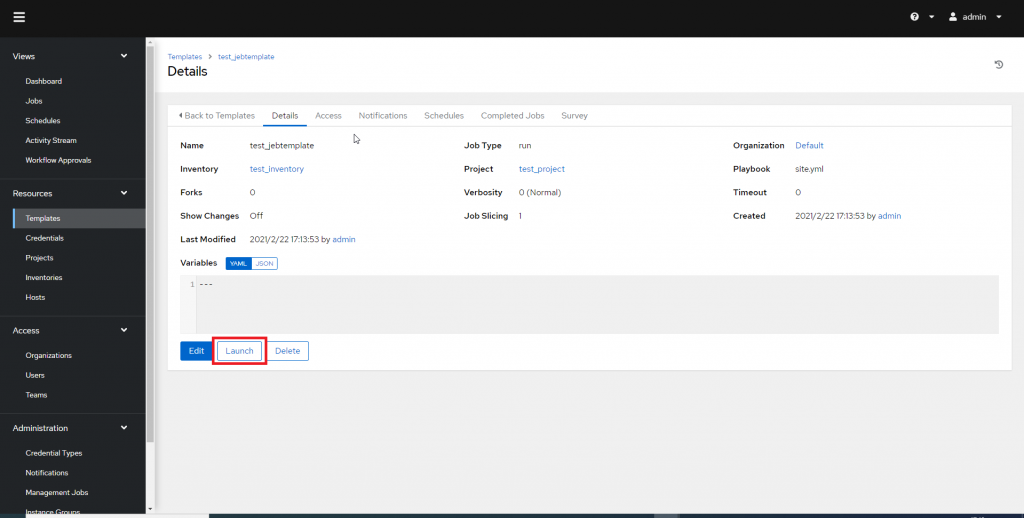
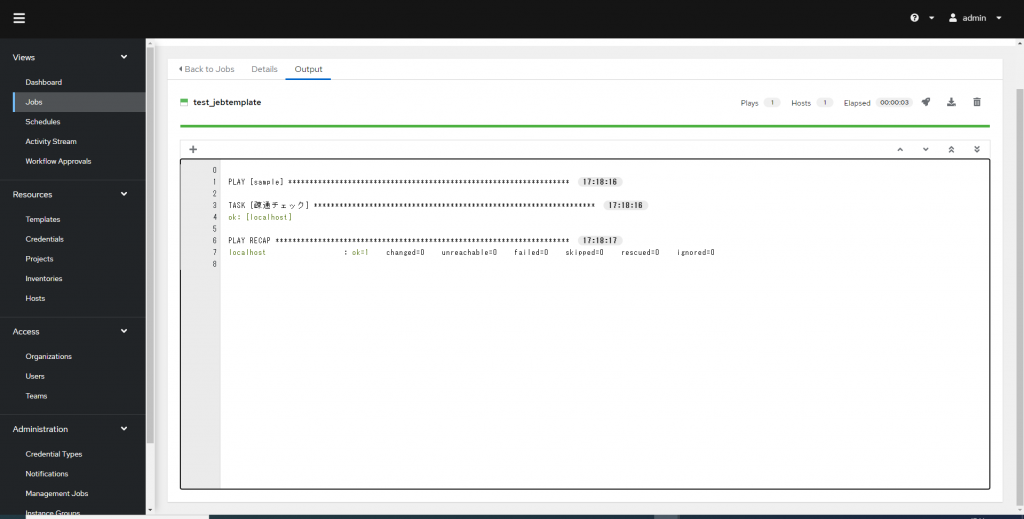
実行結果が緑で『OK=1』になればよいです。
赤で『failed=1』だと実行失敗になります。
また、実行結果を詳細に出力するには、templates内の設定で『Verbosity』があるので、『Debug』などにすれば詳細に確認できます。
4. まとめ
最後までご覧いただきありがとうございました。
本サイトでは、AnsibleAWXとGitLabを同期し、sshで認証を行う。同期後、playbookを実行する手順を行いました。
設定の内容はあくまで一例のため、やり方はいくつか存在します。
例えばAnsibleAWXとGitLabの同期はsshでなくhttpクローンでも問題なくできます。その場合はsshの認証設定も不要になるなど。
AnsibleAWXの使い方は自由ですので、いろんな使い方をしてみて、楽しんで見てはいかがでしょうか。
5. 技術資料
過去に執筆した技術資料をまとめています。
Ansible AWXのバックアップについて
https://qiita.com/cxc/items/b24b86637d7758944c53
Ansible collectionsについて
https://qiita.com/cxc/items/cd5a2b73aa83c5bd65a2
Ansible 入門者向け学習ガイド